Ultimate Windows Startup Optimization Tips for Peak Speed
Is your PC taking forever to boot up, leaving you staring at a spinning loading screen while your productivity takes a hit? Trust me, you aren’t the only one dealing with this. Sluggish boot times are a massive headache for everyone from casual web browsers to seasoned IT professionals. In today’s fast-paced world, sitting around for minutes waiting for your computer to wake up just doesn’t cut it.
By getting to know and actually using some proven windows startup optimization tips, you can seriously cut down those wait times and dive straight into your work. Whether you’re firing up a standard office laptop or fine-tuning a high-end development rig, streamlining that boot sequence is the secret to a much smoother computing experience.
Throughout this guide, we’ll break down exactly why your machine gets bogged down over time. More importantly, we’re going to walk through practical, actionable steps—ranging from simple Task Manager tweaks to deep-level registry adjustments—so you can get your PC running at absolute peak efficiency.
Why This Problem Happens: The Technical Breakdown
Before we jump into the solutions, it really helps to understand what’s actually causing the slowdown behind the scenes. When you press the power button, Windows doesn’t just load up a single file and call it a day. Instead, it kicks off a highly complex, multi-stage sequence designed to wake up your hardware and get your software ready to go.
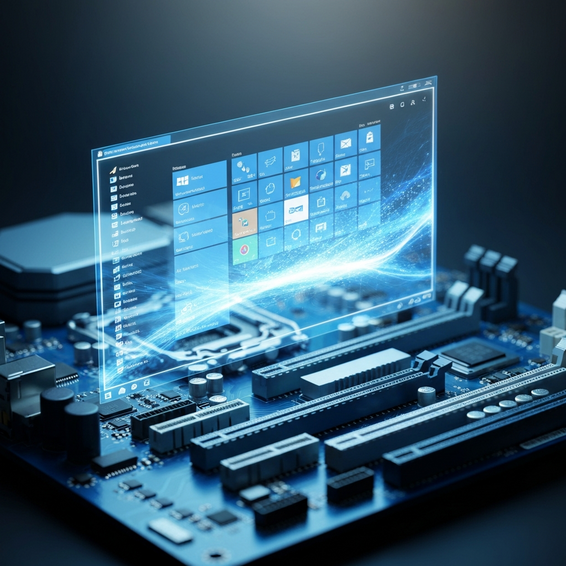
This whole boot process is broken down into a few distinct phases: PreOS, OSLoader, MainPathBoot, and finally, PostBoot. During this sequence, your system has a lot of heavy lifting to do. It needs to load the core NT kernel, initialize crucial hardware drivers, fire up essential background services (which you’ll often spot as svchost.exe in your background processes), and finally launch your user applications.
Where does the traffic jam usually happen? The MainPathBoot and PostBoot phases. This is the exact moment when dozens of third-party apps try to force their way into the active boot sequence all at once. When everything tries to load simultaneously, it puts a massive strain on your CPU’s available threads and pushes your storage drive’s input/output (I/O) limits to the max.
To make matters worse, things like older hardware, messy registry entries, and outdated device drivers just add fuel to the fire. As you install more software over the months and years, your list of startup dependencies naturally grows, dragging your performance down with it. Fixing this requires a smart, systematic approach.
Quick Fixes / Basic Solutions
If you’re looking for fast, noticeable results right out of the gate, start with these accessible windows startup optimization tips. You don’t need a degree in computer science to pull these off, and they can easily shave a massive chunk of time off your startup sequence.
- Disable High-Impact Startup Programs: The built-in Windows Task Manager is your absolute best friend when fighting bloated boot times. Just hit
Ctrl + Shift + Escto open it up, and click over to the “Startup” tab. If you sort the list by “Startup impact,” you’ll immediately spot the biggest resource hogs. Right-click and disable anything you don’t actually need the second you log in—think game launchers, chat apps, or heavy cloud sync tools. - Enable Windows Fast Startup: Both Windows 10 and 11 come with a handy hybrid sleep feature called Fast Startup. Rather than doing a traditional cold shutdown, this tool saves a snapshot of your system state and kernel session straight to a hibernation file. To turn it on, head into the classic Control Panel, go to Power Options, and select “Choose what the power buttons do.” Check the box next to “Turn on fast startup,” and you’ll likely notice a much snappier power-on time.
- Unplug Unnecessary USB Devices: During that very first PreOS initialization phase, your motherboard actually checks every single connected USB port for bootable media. If you leave external hard drives, webcams, or even your phone plugged in, your BIOS wastes precious seconds interrogating them. Simply unplugging peripherals you aren’t using can shave crucial seconds off the initial POST screen.
- Clear Storage Bottlenecks: A storage drive stuffed to the brim is a guaranteed way to cripple your startup speed. Windows desperately needs free space to effectively manage your virtual memory (the paging file) and process temporary boot data. Take advantage of the built-in Windows Storage Sense tool to automatically sweep away junk files, empty out the recycle bin, and reclaim that much-needed disk space.
Advanced Solutions for Developers and IT Pros
For the developers, sysadmins, and power users out there, the basic fixes might not quite hit the mark. If you really want to squeeze every last drop of performance out of your operating system, these deep-level configurations are the way to go.
1. Deep Clean with Sysinternals Autoruns
While Task Manager is great for quick fixes, it only shows a tiny slice of the startup pie. Microsoft offers an incredible advanced utility called Sysinternals Autoruns, which gives you a deeply granular look at everything loading at boot—down to the exact executables, drivers, browser helper objects, and scheduled tasks.
It’s an amazing tool for hunting down hidden services and stubborn registry keys that are secretly bogging your system down. A quick word of warning, though: tread carefully. Disabling core Microsoft system drivers or vital hardware services can easily lead to instability or a PC that won’t boot at all. Always double-check what a process does online before you uncheck its box.
2. Delay Background Services via Services.msc
Not every background service needs to be running the exact millisecond you type in your password. Hit Win + R to open the Run dialog, and type in services.msc. Take a scroll through the list and look for heavy third-party services—things like database updaters, specialized software agents, or printer spoolers.
Once you spot one, right-click it, go to Properties, and switch the “Startup Type” from “Automatic” to “Automatic (Delayed Start)”. This is a brilliant little tweak because it lets Windows prioritize getting your core desktop up and running first, and then quietly launches those secondary services a few minutes later in the background.
3. Optimize BIOS and UEFI Settings
Sometimes, the delay happens before Windows even attempts to load. This comes down to your hardware initialization phase (POST). Restart your machine and mash the designated key (usually Del, F2, or F12) to get into your motherboard’s BIOS or UEFI settings.
Poke around until you find an option for “Fast Boot” or “Ultra Fast Boot,” and turn it on. While you’re in there, disable any legacy boot modes (like CSM) if you’re strictly running a modern operating system. Finally, double-check that your main OS drive is locked in as the absolute first boot device, so your system completely skips over pointless network (PXE) or USB boot searches.
Best Practices for Sustained Performance
Getting your PC to boot quickly is one thing; keeping it that way requires a bit of ongoing system hygiene. Stick to these technical best practices, and you’ll ensure your boot times stay consistently low for the entire lifespan of your machine.
First things first: keep your hardware drivers and system firmware up to date. Motherboard manufacturers routinely push out BIOS updates that can vastly improve hardware initialization, speed up memory training, and boost overall system stability.
Next, you really need to prioritize modern storage. If you’re still trying to run Windows off an old-school spinning Hard Disk Drive (HDD), no amount of clever software tweaking is going to save you. Making the leap to an NVMe Solid State Drive (SSD) is universally the single biggest physical upgrade you can make for boot times. SSDs can handle the massive, concurrent I/O requests that happen during startup exponentially faster than a traditional HDD ever could.
Finally, make time for routine security audits. It’s surprisingly common for hidden malware, annoying spyware, or crypto-miners to disguise themselves as legitimate startup processes, quietly eating up massive chunks of your CPU and RAM. Run deep-system scans regularly using Windows Defender or a reliable third-party antimalware tool just to be sure your startup queue is free of malicious actors.
If you find yourself frequently provisioning new environments, it’s worth checking out smarter ways to work. We highly recommend learning about infrastructure automation so you can deploy clean, optimized Windows images effortlessly across multiple machines.
Recommended Tools & Resources
To make your optimization journey a whole lot smoother, we suggest leveraging these powerful, industry-standard tools:
- Microsoft Sysinternals Autoruns: The ultimate freeware utility for IT admins and advanced users to meticulously track down and manage auto-starting locations and deeply hidden registry keys.
- Windows Performance Analyzer (WPA): A seriously robust developer-grade tool included in the Windows ADK. WPA maps out highly detailed graphs and data tables of your system’s performance, giving developers the ability to generate and analyze specific boot trace logs.
- Hardware Upgrades: As we mentioned earlier, storage speed is the ultimate bottleneck. Check out the top-rated NVMe SSDs on Amazon to massively supercharge your system’s I/O throughput.
If you’re hungry for more resources on building robust, high-performance systems from the ground up, definitely take a look at our comprehensive guide on building and managing a HomeLab.
FAQ Section
Does disabling startup apps really improve overall performance?
Absolutely. When you turn off unnecessary startup applications, you aren’t just speeding up the initial boot process—you’re preventing those programs from constantly hogging resources in the background. This directly frees up valuable RAM and CPU cycles, which makes your entire computer feel much more responsive and capable when multitasking.
What exactly is Windows Fast Startup and should I use it?
Fast Startup is a neat core Windows feature that essentially blends a normal shutdown with system hibernation. When you turn your PC off, Windows writes your kernel state to the hard drive. When you turn it back on, it pulls that saved state right back into memory, drastically reducing your boot time. That said, if you dual-boot different operating systems or deal with a lot of low-level driver crashes, it’s usually safer to leave this feature disabled.
Is it safe to disable all startup programs?
Definitely not. You never want to just go in and blindly uncheck everything. It’s perfectly safe to disable third-party stuff like Spotify, Steam, or Discord, but your core system processes need to stay running. If you accidentally disable vital hardware drivers (like your graphics or audio control panels) or your active antivirus software, you’re asking for system instability and major security vulnerabilities.
How do I check my exact boot time in Windows?
You can pinpoint your exact boot time by diving into the Windows Event Viewer. Just press Win + X and select Event Viewer from the menu. From there, navigate down to Applications and Services Logs > Microsoft > Windows > Diagnostics-Performance > Operational. Look for Event ID 100—that specific log will tell you exactly how long your boot took, right down to the millisecond.
Will adding more RAM improve my startup speed?
Adding more RAM is fantastic for heavy multitasking and running memory-hungry software, but it won’t do much for your boot times. It might give you a tiny boost if your system was completely starved for memory before, but if you want a massive, undeniable drop in wait times, upgrading your storage drive from an HDD to a fast SSD is the right move.
Conclusion
Nobody should be forced to sit around endlessly waiting for their computer to finally become usable. By getting a handle on the technical bottlenecks and putting these windows startup optimization tips to work, you can win back your valuable time and enjoy an OS that actually responds when you need it to.
We suggest kicking things off with the easy wins first—clean up your Task Manager startup tab and switch on Fast Startup. Once you’ve got the basics handled, don’t be afraid to dig into developer tools like Sysinternals Autoruns to fine-tune your configuration even further. Put these strategies into practice today, maintain a clean hardware environment, and finally get to experience the lightning-fast performance your PC was originally built to deliver!